
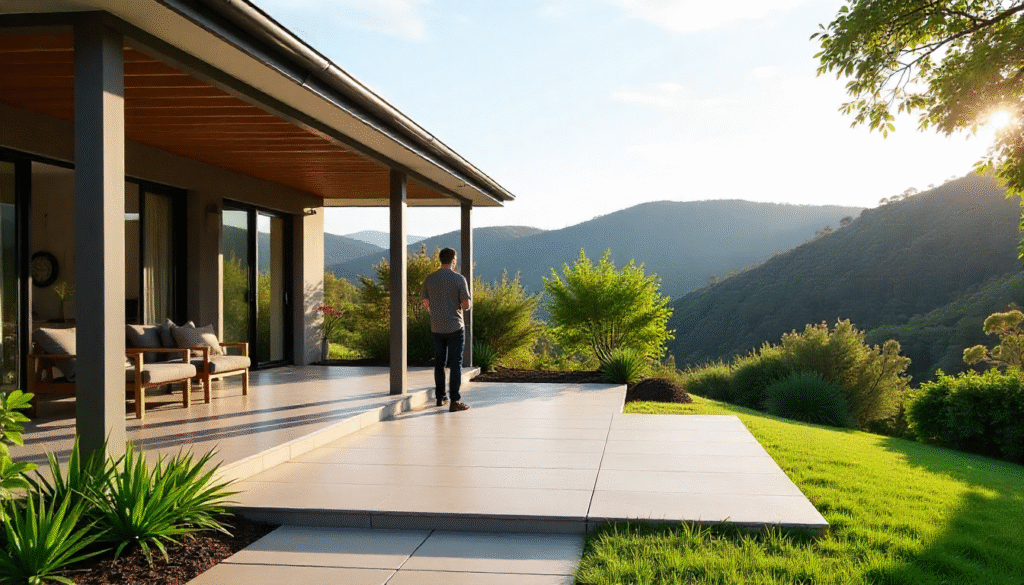
If you’re standing in your Mount Lofty property wondering whether that concrete slab can support your new pergola, deck, or outdoor entertainment area, you’re asking the right question. Last week, I met with a homeowner on Stenner Street who’d been staring at his backyard patio for months, dreaming of a beautiful shade structure but worried about drilling into his existing concrete. Sound familiar?
Yes, you absolutely can anchor into concrete – but here in Mount Lofty, with our unique hillside terrain and Queensland weather patterns, there’s more to it than just grabbing a drill and some bolts from Bunnings. The sloping blocks and reactive soils that make our suburb so scenic also create specific challenges when it comes to concrete anchoring Mount Lofty properties face every day.
Getting your anchoring wrong isn’t just about a wobbly pergola post. We’re talking potential property damage, safety hazards for your family, and costs that can spiral from a few hundred dollars to several thousand when repairs are needed. I’ve seen concrete slabs crack from improper anchoring techniques, and trust me, replacing a damaged slab on a Mount Lofty hillside property ain’t cheap.
Over the next few sections, I’ll walk you through the exact types of anchors that work best in our local conditions, share the professional techniques we use daily across Toowoomba, break down when you can tackle a project yourself versus when you need the pros, and give you realistic cost expectations. By the time you finish reading, you’ll know exactly what questions to ask and what to look for in your concrete project.
Can You Anchor Into Concrete? Quick Answer
Yes, you can anchor into concrete using several methods:
- Mechanical anchors (wedge anchors, sleeve anchors)
- Adhesive anchors (epoxy or polyester resin)
- Cast-in-place anchors (for new concrete)
- Concrete screws (for light-duty applications)
The key factors for successful concrete anchoring in Mount Lofty include:
- Concrete age and strength (minimum 2,500 PSI)
- Proper hole depth and diameter
- Correct anchor type for load requirements
- Professional installation for structural applications
- Consideration of local soil movement and weather conditions
Understanding Concrete Anchoring Systems for Queensland Homes

Types of Concrete Anchors
Here’s the thing about concrete anchors – walking into a hardware store without knowing what you need is like trying to order coffee in Italy without speaking Italian. You’ll get something, but it probably won’t be what you wanted.
Mechanical expansion anchors are the workhorses of the anchoring world. These bad boys work by expanding against the concrete when you tighten them. Think of it like spreading your arms and legs when you’re climbing between two walls – the pressure keeps you in place. Wedge anchors and sleeve anchors fall into this category, and they’re what we use most often for deck posts and pergola installations across Mount Lofty homes.
Chemical or adhesive anchoring systems are a whole different animal. Instead of mechanical pressure, you’re basically gluing a threaded rod into the concrete using epoxy or polyester resin. Sounds simple, right? Well, here’s where it gets interesting – these anchors can actually be stronger than mechanical ones, especially in older concrete that might be a bit weathered. We used these just last month on a heritage home near the Mount Lofty Lookout where the concrete was showing its age but still solid enough for anchoring.
Screw-in anchors, or what most people call Dynabolts, are your go-to for lighter stuff. Hanging a garden hose reel? Perfect. Supporting a full outdoor kitchen? Not so much. These work great for attaching timber battens to concrete walls or securing lightweight shade cloth frames.
Drop-in anchors are the sneaky option – they sit flush with the concrete surface when not in use. They’re brilliant for areas where you might need to remove whatever you’re attaching seasonally, like temporary market stalls or Christmas light displays.
Load Ratings and Safety Factors
Now, I know nobody gets excited about Australian standards and load calculations, but stick with me here because this stuff matters when you’re dealing with concrete anchoring Mount Lofty’s hillside properties.
Every anchor comes with a load rating, but here’s what they don’t tell you on the package – that rating assumes perfect concrete in perfect conditions. Our Queensland weather, with its storms, heat cycles, and occasional cold snap, means we need to build in bigger safety margins. A anchor rated for 1000kg doesn’t mean you should load it with 1000kg. We typically work with a 4:1 safety factor, so that 1000kg anchor should really only carry 250kg in actual use.
The weight distribution matters too. A 200kg load pulling straight down is completely different from the same weight creating a sideways pull, especially on our sloped blocks where gravity’s already working against us.
Mount Lofty Concrete Conditions: Choosing the Right Anchors
Local Climate Considerations
Mount Lofty’s weather is like that friend who can’t decide what to wear – constantly changing. Yesterday it was 35 degrees, today we had a storm, and tomorrow? Who knows. This temperature rollercoaster affects your concrete more than you might think.
When concrete heats up, it expands. When it cools, it contracts. Do this dance enough times, and you get micro-cracks that can weaken anchor points. That’s why we often recommend chemical anchors for outdoor applications here – they flex with the concrete rather than fighting against it.
The moisture situation is another beast entirely. Mount Lofty cops about 700mm of rain annually, but it don’t come down nice and steady. We get those massive storms that dump 50mm in an hour, then nothing for weeks. This creates a wet-dry cycle that can cause concrete to deteriorate around mechanical anchors if they weren’t sealed properly during installation.
And don’t get me started on those surprise winter frosts. While we don’t get the freeze-thaw cycles like they do down south, even our mild temperature drops can affect fresh adhesive anchors. That’s why timing your project matters – installing anchors during stable weather gives you the best shot at long-term success.
Soil Movement and Hillside Challenges
If you’ve lived in Mount Lofty for more than five minutes, you know about our reactive soils. These clays expand when wet and shrink when dry, and on a slope, this movement gets amplified. I’ve seen concrete slabs move 40mm over a season – doesn’t sound like much until your anchored pergola posts start looking like the Leaning Tower of Pisa.
The slope stability factor is huge for us hillside dwellers. Water runs downhill (shocking, I know), but this means the lower side of your slab cops more moisture and movement. We often spec different anchors for uphill versus downhill posts on the same structure. The uphill side might get standard wedge anchors, while the downhill side needs deeper chemical anchors to handle the extra stress.
Foundation movement prevention starts with understanding your specific block. Got a retaining wall above your slab? That changes everything. Water drainage patterns, existing cracks, previous movement – it all factors into choosing the right anchoring system.
Age of Concrete in Established Mount Lofty Homes
Most Mount Lofty homes are pushing 15 to 50 years old, and that concrete has stories to tell. Testing concrete strength isn’t just hammering it and saying “she’ll be right” – we use rebound hammers that measure surface hardness to estimate the internal strength.
Older slabs often surprise us. That 1970s concrete might look rough on top but be solid as a rock underneath. Or it might be the opposite – smooth surface hiding deterioration below. We had a job last month where the homeowner’s 1980s slab tested stronger than some new pours we’ve seen. Back then, they mixed concrete different, usually with more cement, making it denser.
The reinforcement situation in older slabs can be tricky too. Modern slabs have predictable rebar patterns, but older ones? It’s like a treasure hunt. We use rebar detectors before drilling because hitting steel can weaken the anchor hold and damage your drill bit. Sometimes we find mesh, sometimes individual bars, sometimes nothing at all. Each scenario needs a different approach to anchoring.
Professional Anchoring Techniques Used by Local Concrete Contractors
Site Assessment Process
Before we even think about drilling, we’re doing homework. Concrete thickness testing comes first – we use ultrasonic equipment or, for critical applications, we’ll take a small core sample. Most residential slabs in Mount Lofty run 100mm thick, but verandah slabs might only be 75mm, and driveways could be 150mm or more.
Rebar detection is like using a metal detector at the beach, except instead of finding coins, we’re mapping out the steel skeleton inside your concrete. Modern detectors show us depth and direction of reinforcement, letting us plan anchor locations that avoid the steel. Hit rebar with your anchor, and you’ve just created a weak point that’ll fail under load.
Load requirement calculations aren’t just about the weight of what you’re mounting. We factor in wind loads (Mount Lofty can get some serious gusts), live loads (that party you’re planning with 30 people on the deck), and dynamic loads (kids using the pergola posts as gym equipment). A proper calculation might show you need six anchors instead of four, or deeper embedment than you planned.
Installation Best Practices
The drilling technique separates the pros from the weekend warriors. Speed kills concrete – drill too fast and you’ll overheat the bit, creating micro-fractures around the hole. We run hammer drills at medium speed with steady pressure, pulling out every few seconds to clear dust. For chemical anchors, we might use diamond core bits that cut cleaner holes.
Hole cleaning is where most DIY jobs fail. You can’t just blow the dust out with your mouth and call it done. We use compressed air, then a bottle brush, then compressed air again, and for chemical anchors, sometimes we’ll even vacuum the hole. Any dust left behind acts like a barrier between the anchor and concrete, reducing holding power by up to 50%.
Torque specifications are precise for a reason. Under-tighten and your anchor won’t expand properly. Over-tighten and you can crack the concrete or strip the threads. We use torque wrenches set to manufacturer specs, not the “bit more for good luck” method. For a typical M12 wedge anchor, we’re talking about 60Nm of torque – that’s specific, not approximate.
Curing times for adhesive anchors can’t be rushed. Temperature affects cure rate massively. In Mount Lofty’s summer heat, epoxy might set in two hours. Winter? Could be six hours or more. We’ve seen jobs fail because someone loaded the anchors before full cure. The chemical needs time to reach full strength, and patience here saves problems later.
Quality Control Measures
Pull-out testing isn’t just yanking on the anchor to see if it moves. We use hydraulic testing equipment that applies measured force, recording the exact load at which any movement occurs. For critical applications, we’ll test one anchor per set to destruction, then install extras to maintain safety factors.
Our inspection protocols cover everything from hole depth to thread engagement. We photograph each installed anchor before anything gets attached, documenting the installation for warranty purposes. If there’s ever a question about the job, we’ve got the evidence.
Documentation requirements go beyond just keeping council happy. We provide clients with anchor specifications, load ratings, installation dates, and cure times. This information stays with the house and can be valuable for future modifications or if you ever sell the property. Buyers love seeing professional documentation for structural work.
DIY vs. Professional Concrete Anchoring: What Mount Lofty Homeowners Should Know
DIY-Appropriate Projects
Look, I’m not gonna tell you that every anchoring job needs a professional. If you’re mounting a garden hose reel, a small mailbox, or lightweight decorative elements under 50kg total load, go for it. These light-duty applications don’t risk structural failure if something goes wrong.
The tools you’ll need for basic DIY anchoring aren’t bank-breakers. A decent hammer drill (not your regular drill with a hammer setting), proper masonry bits, safety glasses, dust mask, and a way to clean the holes. Figure about $300 for tools if you don’t have them, plus your anchors and time.
Skills-wise, you need patience more than anything. Drilling into concrete isn’t like drilling timber – it takes time, the right technique, and knowing when to stop. If you’re comfortable reading instructions, measuring twice, and taking your time, simple anchoring projects are definitely achievable.
When to Call Professionals
Structural connections are our bread and butter because they’re not DIY territory. Pergolas, decks, carports, retaining wall tie-backs – these need engineering considerations and proper installation. Get these wrong, and we’re not talking about a wonky picture frame; we’re talking about structures that could fail and hurt someone.
Heavy load applications need professional assessment even if they seem simple. That hot tub you want on the concrete pad? The aggregate bin for your landscaping business? The boat you want to secure? These create complex loading patterns that need proper analysis and anchor selection.
Hillside and retaining wall anchoring is particularly critical in Mount Lofty. The soil pressure, water drainage, and potential for movement mean these anchors are under constant stress. We use specific techniques and anchor types for slope stabilization that go way beyond standard concrete anchoring.
Council requirements kick in sooner than most people realize. Any structural work typically needs approval, and they’ll want to see proper specifications and installation by licensed contractors. We handle the paperwork as part of the service, but DIYers often get caught out thinking they don’t need permits.
Cost Comparison
DIY material costs for basic anchoring run about $10-30 per anchor point, depending on the type and size. Add tools if you don’t have them, your time, and the risk factor if something goes wrong. A simple four-anchor pergola post might cost you $150 in materials if you do it yourself.
Professional service pricing includes assessment, proper tools, installation, testing, and warranty. The same four-anchor pergola post professionally installed might run $400-600. Yeah, it’s more expensive upfront, but you’re buying peace of mind and someone to call if anything goes wrong.
Long-term value considerations often tip the scales toward professional installation. We guarantee our work, carry insurance, and provide documentation that adds value to your property. DIY work, even if done well, doesn’t carry the same weight when you’re selling your home or making insurance claims.
Load-Bearing Considerations for Hillside Properties in Mount Lofty

Unique Challenges of Slope Construction
Lateral forces on Mount Lofty’s slopes are like that annoying cousin who pushes you when you’re not expecting it. Gravity wants everything to slide downhill, and your anchors are all that’s stopping it. We calculate lateral loads at about 30% of vertical loads on moderate slopes, more on steeper blocks.
Wind uplift becomes savage on hillside properties. You’re not just dealing with regular wind; you’re dealing with wind that accelerates up the slope. That peaceful pergola can become a sail in a storm, putting massive uplift forces on your anchors. We typically spec 50% more anchors on the windward side of hillside structures.
Queensland’s seismic factors are minimal but not zero. We’re not California, but we still design for minor earth movement. This means using anchors that can handle some flex without failing, particularly important given our reactive soils already create movement.
Engineering Requirements
Engineering reports become necessary when you’re dealing with spans over 3 meters, heights over 3 meters, or any retaining wall applications. The engineer assesses soil conditions, concrete strength, and loading requirements to specify exact anchoring solutions. This isn’t bureaucracy – it’s about making sure your structure stays put.
Mount Lofty council requirements reflect our unique topography. They know our slopes and soils, so they’re stricter about anchoring specifications than flat suburbs. Recent changes mean even some pergola installations need engineering sign-off if they’re on slopes greater than 15 degrees.
Insurance implications hit home when claims time comes. Professional anchoring with proper documentation means your claim sails through. DIY work without permits or documentation? Good luck explaining that to your insurer after storm damage.
Common Applications
Deck and pergola attachments on slopes need special consideration. We often use a combination of post bases anchored to concrete and lateral bracing to handle the slope forces. Standard pergola brackets won’t cut it on a Mount Lofty hillside.
Retaining wall tie-backs are critical safety elements that need professional installation. These anchors go deep into stable soil behind the wall, holding massive loads. We’re talking about preventing wall collapse here, not hanging a picture.
Pool fence installations might seem straightforward, but pool safety regulations are strict. The anchors need to withstand specified forces in any direction, and inspectors check these carefully. We use chemical anchors for most pool fences because they provide the consistent strength needed.
Shade sail mounting points cop huge forces, especially in storms. Those beautiful sails that keep your car cool become massive wind catchers. We calculate forces based on sail size and design mounting points that can handle five times the expected load.
Anchoring in Older Concrete: Special Considerations for Established Mount Lofty Homes
Assessing Existing Concrete
The visual inspection checklist starts with the obvious stuff. Cracks wider than a credit card need attention before anchoring. Surface scaling or flaking suggests weathering that might go deeper. Rust stains indicate corroding reinforcement that could affect anchor holding. Dark patches might show moisture problems.
Testing methods go beyond the visual. We tap test with a hammer – solid concrete rings, deteriorated concrete thuds. For critical applications, we might use a Windsor probe that shoots a pin into the concrete to measure resistance. Sometimes we’ll take a small core sample to lab test if we’re really concerned.
Knowing when to repair before anchoring saves headaches later. Small cracks can be injected with epoxy before drilling. Spalled areas might need patching and curing before anchor installation. Sometimes the best solution is to avoid damaged areas altogether and relocate anchor points to sound concrete.
Retrofit Solutions
Strengthening existing slabs doesn’t always mean replacement. We can add a bonded topping layer for extra thickness, inject grout underneath for better support, or install supplementary reinforcement. These solutions cost less than replacement and can make marginal concrete suitable for anchoring.
Alternative anchoring methods for challenged concrete include through-bolts that go completely through thin slabs with plates underneath, adhesive-mounted base plates that spread loads over larger areas, or external frame systems that bypass the concrete entirely.
Avoiding damage to older concrete requires a gentle touch. We might use smaller diameter anchors in greater numbers rather than fewer large ones, or choose chemical anchors that don’t create the expansion stress of mechanical types.
Common Problems and Solutions
Dealing with cracks requires understanding why they’re there. Shrinkage cracks are usually stable and can be bridged with proper anchor selection. Movement cracks need investigation before any anchoring. We might install crack monitors to track movement over time before deciding on an anchoring strategy.
Spalling concrete, where the surface flakes off, needs careful assessment. Surface spalling might not affect anchoring if the concrete below is sound. Deep spalling suggests more serious deterioration that needs addressing before any structural attachments.
Previous anchor holes are everywhere in older slabs. Filling them properly matters – we use non-shrink grout or epoxy, not regular concrete patch. New anchors need to be minimum 5 anchor diameters away from old holes to avoid weakened zones.
Your Next Steps for Concrete Anchoring Success
Right, so you’ve made it this far and your head’s probably spinning with information about concrete anchoring Mount Lofty properties need. Let’s make this simple. If you’re planning anything structural – pergolas, decks, carports, retaining walls – get professional help. The cost difference between DIY and professional installation is nothing compared to the cost of failure.
For those smaller projects you’re thinking of tackling yourself, start with proper planning. Measure twice, drill once, and don’t rush the job. Buy quality anchors from reputable suppliers, not the bargain bin specials. And if you hit unexpected resistance while drilling or the concrete seems questionable, stop and get advice.
The reality is that every Mount Lofty property is different. Your neighbor’s successful DIY project don’t mean yours will go the same way. Different concrete ages, different soil conditions, different slopes – they all affect what anchoring solution you need.
Want a Professional Assessment?
Look, I get it. You’ve got a vision for your outdoor space, and you want to know if your concrete can handle it. Instead of guessing or risking a failed DIY attempt, why not get a professional assessment? We offer free concrete anchoring evaluations for Mount Lofty properties where we’ll test your concrete, assess the loads, and give you a proper quote for professional installation.
Book Your Free Concrete Assessment Today
Call us on (07) 4580 2871 or book online for your free concrete anchoring assessment. We’ll test your slab strength, check for reinforcement, and provide a detailed quote for your specific project. Whether it’s a pergola, deck, or retaining wall, we’ve got the local expertise to get your anchoring right the first time.
Available Monday to Saturday, with response times under 24 hours for Mount Lofty residents. Every installation comes with our 10-year warranty and full documentation for your records.
Don’t let uncertainty hold your project back – get the facts about your concrete and your anchoring options today.